Norbert Wiedermann B.Sc.
current Projects
- Applications for TISCH
- improving configuration of touchd
- video tutorials explaining how to setup libTISCH
- connect libtisch to Kinect in Windows and Linux
a brief description on howto get libtisch-2.0 running using the Kinect (libfreenect)
First of all, you need to get libtisch-2.0. It is availble via the sourceforge repository located at:
https://tisch.svn.sourceforge.net/svnroot/tisch, further information here:
http://sourceforge.net/projects/tisch/develop
Linux (Ubuntu)
Please make sure, that you work with libtisch-2.0 and check that libtisch-2.0/build/lib is available in your $LD_LIBRARY_PATH variable. You can set this variable in your .bashrc in your home directory with this command: export LD_LIBRARY_PATH=/path/to/..../libtisch-2.0/build/lib
- install libfreenect according to one of those HowTos: http://openkinect.org/wiki/Getting_Started#Linux and make sure libfreenect is running properly by testing with the demo applications located at libfreenect/build/bin/
- in order to compile libtisch-2.0 with libfreenect make sure that PKG_CONFIG_PATH includes the path to libfreenect.pc file, which is located at /libfreenect/build/src . That enables the switch HAS_FREENECT and by that libtisch is compiled using libfreenect. You can set PKG_CONFIG_PATH in your .bashrc in your home dir and verify whether the lib is found by pkg-config --libs libfreenect
- copy /include/libfreenect.h to libtisch-2.0/libs/simplecv/
- then simply do a make clean && make all && make install in the libtisch-2.0 folder
- important make sure that the libfreenect library (libfreenect.so) is in $LD_LIBRARY_PATH (e.g. in .bashrc: export LD_LIBRARY_PATH=/path/to/libtisch-2.0/build/lib:/path/to/libfreenect/build/lib)
Windows
- install libfreenect according to this HowTo: http://openkinect.org/wiki/Getting_Started#Windows
- open libtisch-2.0/scripts/common.props and find <freenect>Insert Path to freenect here</freenect> and provide here the path to the include directory of libfreenect, e.g. <freenect>C:\kinect\libfreenect\include</freenect>
- important go to your libusb folder, copy lusb0_usb.h and rename it to usb.h
- open libtisch_vs2010.sln in Visual Studio
- you have to adjust settings for the following projects:
- libsimplecv
- libgesture
- touchd
In each project you should adjust the paths for both: Debug and Release.
libsimplecv
- select properties and find C/C++ > Additional Include Directories and add the two following paths:
- path to pthread include ( e.g. C:\kinect\pthread\Pre-built.2\include )
- path to libusb include ( e.g. C:\kinect\libusb-win32-bin-1.2.5.0\include )
- find Linker > additional Library Directories and add the following paths:
- path to libusb ( e.g. C:\kinect\libusb-win32-bin-1.2.5.0\lib\msvc )
- path to lib pthread ( e.g. C:\kinect\pthread\Pre-built.2\lib )
- path to libfreenect ( e.g. C:\kinect\libfreenect\VS2010\lib\Release )
libgesture
- select properties and find VC++ Directories > Library Directories and add the following paths
- path to libusb ( e.g. C:\kinect\libusb-win32-bin-1.2.5.0\lib\msvc; )
- path to libfreenect ( e.g. C:\kinect\libfreenect\VS2010\lib\Release; )
- path to lib pthread ( e.g. C:\kinect\pthread\Pre-built.2\lib; )
touchd
- for the touchd you have to adjust the following settings, select properties and find C/C++ > additional Include Directories and add:
- path to pthread include ( e.g. C:\kinect\pthread\Pre-built.2\include; )
- C/C++ > Preprocessor
- now recompile libtisch
- to get libtisch application running using libfreenect you have to copy freenect.dll to the same folder the libtisch apps are in.
- copy freenect.dll to libtisch-2.0/Release/
connect libtisch with libfreenect
In order to get libtisch running using the Kinect as input device there are the following steps you have to do:
- plug-in the Kinect
- start touchd -c ../drivers/touchd/sample_kinect.xml -V (in Ubuntu you need to be root, so sudo -s and then start touchd with the given command)
- start calibtool and calibrate your display
- start calibd
- start the application (e.g. demo)
Hints
- If you, like myself, have build your libusb by your own and you encounter a huge amount of debugging information while executing touchd (those debugging lines have their origins in the libusb), then you might find this switch helpful: ./autogen.sh --disable-log (see github: https://github.com/ofTheo/ofxKinect/issues/48 that reduces the output a little

Videotutorials for installing and using libTISCH
I have finished the video tutorials covering installation and configuration of the TISCH library. You can watch the tutorials on youtube:
- Tutorial 1 for libTISCH 1.1.2 In this tutorial I explain where you can find information and the source of the TISCH library. I demonstrate how to compile and install libTISCH on a Windows 7 PC. The tutorial is concluded with a demonstration of some example application. Slides
- Tutorial 2 for libTISCH 2.0 This tutorial explains how to get version 2 of libTISCH from our SVN at sourceforge. I explain in detailed step what you have to do, to get the library downloaded, compiled and installed. I am using a Windows 7 PC, but libTISCH is also available for Linux and Mac. Check our projects website for more information. The tutorial concludes with some demo applications to show what you can do with the library. Slides
- Tutorial 3 for libTISCH 2.0 using Kinect This Videotutorial explains how you can connect a Kinect to the TISCH library. I briefly show you which software is necessary to get the Kinect working with your Windows 7 PC. Afterwards I explain what you have to change to connect the Kinect to libTISCH. Having everything setup I show you my environment settings and give you a demonstration. Slides
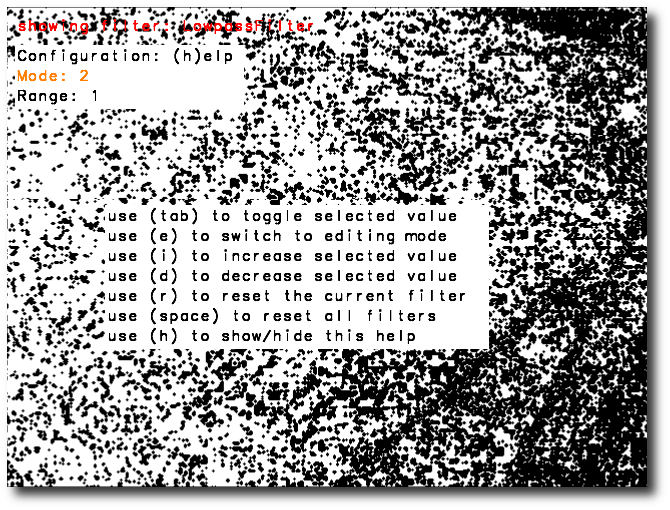
- Tutorial 4 for libTISCH 2.0 with Kinect In this tutorial the different keyboard shortcuts are presented. Filters for processing the images captured are managed in a XML config file for touchd. Filter settings can be adjusted while touchd is running using the Configurator. This tutorial explains also how to adjust the settings of different filters in the chain. With the working surface defined, the calibration process is perform to demonstrate how to set up a working system. Slides
Configurator for adjusting touchd filter options
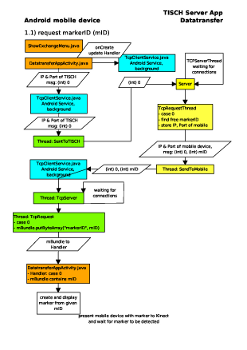
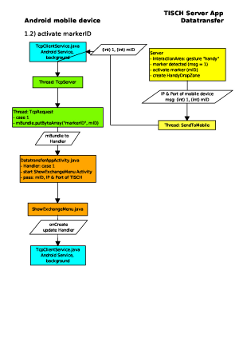
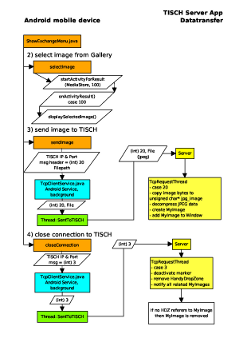
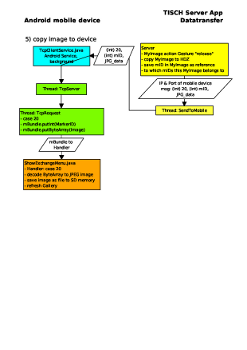
Exchange data between Android device and libTISCH
Setup libTISCH with Kinect
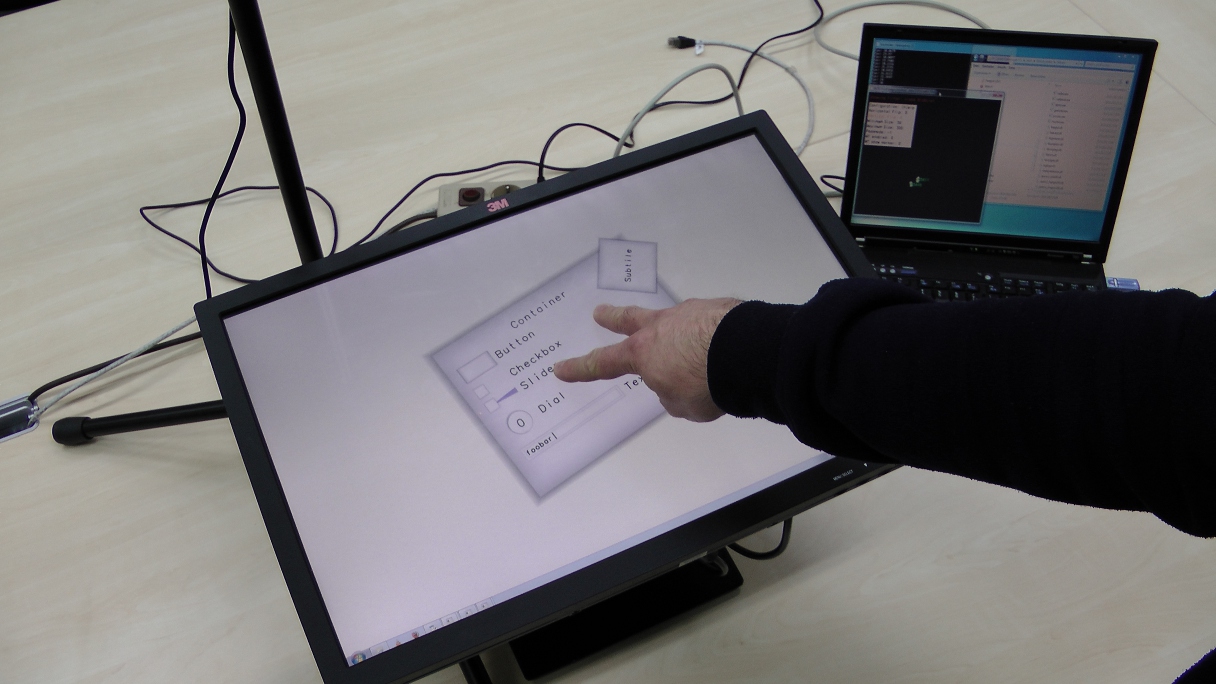
Here I present some images of the setup I use. For development I use a Laptop with Windows 7 Professional 32 bit. As interaction area I use a 24 inch TFT monitor attached to my laptop. The Kinect is mounted on a microphone stand above the monitor. The monitor is used to display the program that receives the touch input signals, recognized using the depth sensor of the Kinect. These signals are processed by libTISCH and the results are displayed on the external monitor.
Video tutorials
The following software I have used to create the video tutorials:
- Screen recodings are made using CamStudio Recorder v2.6. As Compressor I used Xvid MPEG-4 Coded, with quality 70 and key frames every 25 frames. I captured a frame every 40 ms with a playback rate of 25 fps. The Compressor is set to Xvid HD 720 profile using single pass compression. I set the screen resolution to 1280x720 and captured full screen.
- Screen annotations and zooming is done using ZoomIT
- Another helpful software is Sizer v3.3. It can be used to adjust the size of windows quite easily.
- Audio recordings are done using Audacity
- Cutting and editing is done with Windows Live Movie Maker
Publications


